
Recent Post

Versatile Resistance Band Training: How-To Guide

Certified Gluten Free Whey Isolate: 2026 Buying Guide

Ultra-Portable Grip Technology: 2026 Travel Yoga Mats

Versatile Suspension Framework: 2026 Pull Up Bar Guide
Modular Space-Efficiency: 2026 Compact Home Gym Ideas

Is It Dairy-Free? Advanced Dairy-Derived Isolate Guide
Leave a comment
Versatile Resistance Band Training: How-To Guide
Ever walked into your living room, glanced at that spare door, and thought, "If only I could turn this into a mini gym?"
We've all been there – craving a solid strength workout but limited by space, budget, or the dreaded gym commute.
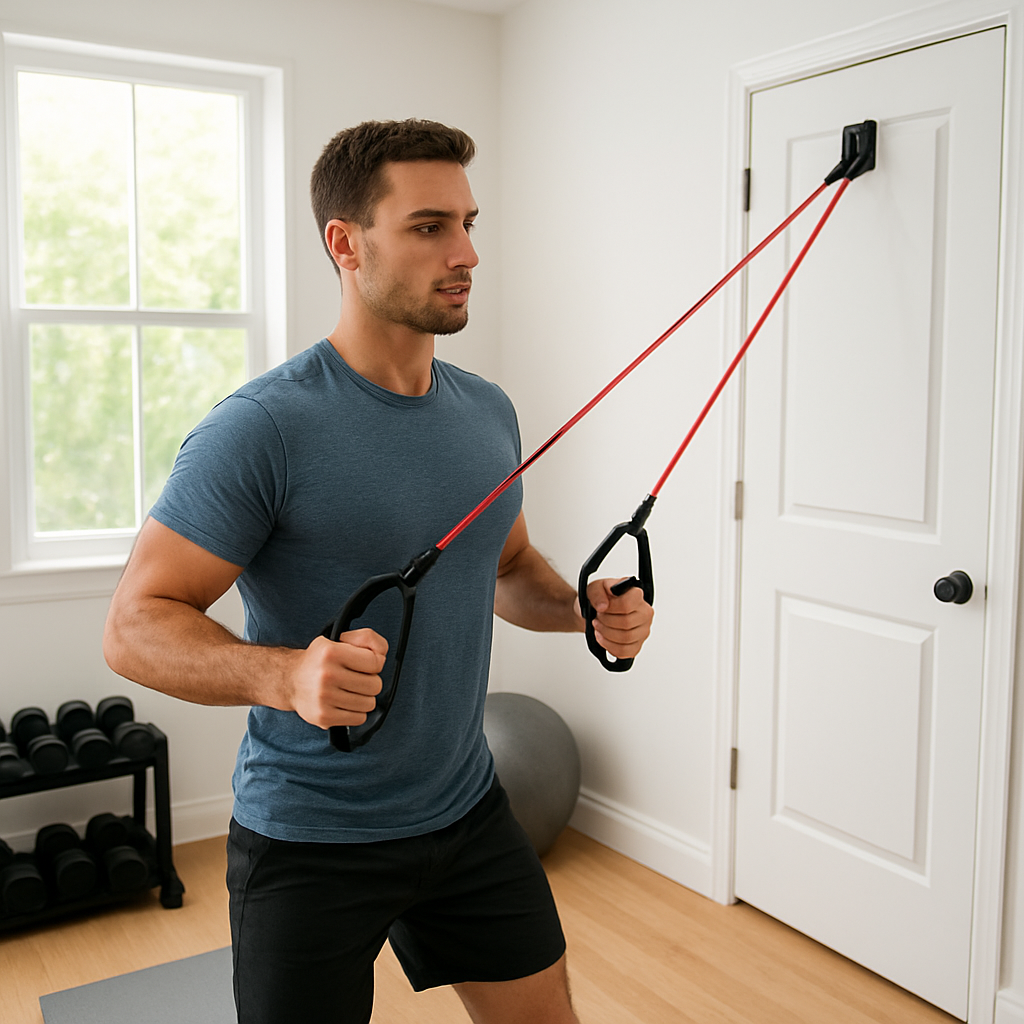
Enter resistance bands with handles and a door anchor: a tiny, cheap setup that can mimic rows, presses, curls, and even leg work without a squat rack.
In our experience at FitCore Supply, the moment a client unhooks the band from the door and feels that tension, you can see the lightbulb go off – "this is actually doable at home".
But why the handles? Think of them as the handshake between you and the band, giving you a secure grip, better wrist alignment, and the ability to pull in a natural range of motion. No more slipping or awkward wraps that leave your palms tingling.
The door anchor does the heavy lifting for you. It converts a simple door frame into a stable anchor point, letting you perform vertical pulls, hip hinges, or even assisted pull‑ups without drilling holes or buying pricey equipment.
If you're a personal trainer juggling client sessions in cramped apartments, a rehab specialist guiding a patient through low‑impact shoulder rehab, or just someone who wants to squeeze a quick full‑body circuit before work, this combo checks all the boxes: portable, versatile, and safe.
So, what does a typical routine look like? Imagine anchoring the band at chest height, stepping back to create tension, and then rowing your elbows back while keeping elbows close to your torso. Switch to a squat position, hold the handles at shoulder level, and press upward, feeling your glutes fire as the band resists.
Sounds simple, right? The beauty is that you can adjust the resistance by choosing a thicker band or stepping farther away – no need for a gym membership to chase progressive overload.
Ready to see how this humble setup can reshape your workouts, speed up recovery, and keep your training consistent, rain or shine?
Let's dive in and explore the best ways to use resistance bands with handles and a door anchor, from warm‑ups to advanced strength circuits.
TL;DR
With resistance bands with handles and a door anchor, you can turn any doorway into a full‑body gym, delivering rows, presses, squats and rehab moves without pricey equipment. Adjust the tension by swapping band thickness or stepping farther back, and you’ll get progressive overload that fits apartments, clinics, or on‑the‑go training routines.
Choosing the Right Resistance Bands with Handles and Door Anchor
Ever stood in front of a rack of bands and thought, “Which one actually fits my doorway gym?” You’re not alone. The first step is to get clear on the three variables that drive every decision: band thickness (which sets the resistance range), handle style (which affects grip comfort), and door‑anchor design (which determines stability and placement).
Material matters
Most of the bands we stock at FitCore Supply are made from natural latex because it offers consistent stretch and a smooth snap‑back. Fabric‑wrapped bands feel softer on the hands, but they can lose a few percent of tension after a dozen reps. If you’re training for power‑based moves like chest presses or assisted pull‑ups, latex gives you that crisp, predictable pull you need.
Handle choices – grip it right
Handles come in two main flavors: molded plastic grips and padded fabric cuffs. Molded grips lock the band in a fixed position, which is great for rows and dead‑lift‑style pulls where you want a solid anchor point. Padded cuffs let the band slide a bit, mimicking a free‑hand feel for bicep curls or overhead presses. In our experience, clients who do a lot of upper‑body rehab gravitate toward the padded version because it eases wrist strain.
Door anchor compatibility
Not every door is created equal. A sturdy, hollow‑core door with a metal strike plate will hold most anchors, but a flimsy interior door can snap under high tension. Look for anchors that feature a wide base plate and a quick‑release hook – those designs spread the load across the frame and let you switch sides in seconds.
Matching resistance to your goals
If you’re a personal trainer crafting circuits for busy clients, start with a light‑to‑medium band (≈15–30 lb) for warm‑ups and mobility drills, then jump to a heavy band (≈50–70 lb) for strength moves. Rehab specialists often stay in the low‑range (≈5–15 lb) to protect joints while still providing enough load for neuromuscular re‑education.
Progressive overload works with bands, too. The trick isn’t just adding a thicker band; you can also step a few inches farther from the anchor or raise the anchor height to increase the lever arm. That little adjustment can add 10‑20 lb of effective resistance without buying a new set.
Space‑savvy sizing
Because the whole system folds flat, you can stash it under a couch or in a gym bag. When you’re traveling, a compact 3‑band set with a single anchor fits in a carry‑on. Just make sure the door you plan to use is at least 30 inches tall – otherwise the anchor won’t engage fully.
Budget tips
Don’t feel pressured to buy the most expensive set right away. A starter kit with two bands and a basic anchor gives you enough variety to experiment. As you discover which exercises you love, you can add a heavier band or a premium handle set later. Think of it as building a toolbox piece by piece.
Safety first
Before every session, give the band a quick visual check for cracks or fraying. Test the anchor by pulling on it with one hand while the other holds the handle – if it feels wobbly, reposition the door or swap to a metal‑frame anchor. A quick safety habit can prevent a nasty snap that ruins a workout and a band.
Putting it all together
Here’s a simple decision matrix you can run through while you’re shopping: material (latex vs fabric), handle type (molded vs padded), anchor style (wide‑base vs clip‑on), and resistance range (light, medium, heavy). Match each choice to your primary use – strength, rehab, or hybrid – and you’ll walk out of the store with confidence.
For a broader perspective on building a balanced home‑gym, you might explore resources from Prosper With Althea, which dives into how affordable equipment can support long‑term health goals.
Now that you’ve got the fundamentals down, grab your favorite band, hook it to the door, and feel the difference a well‑chosen setup makes in your next rep.
Setting Up Your Door Anchor Safely
Alright, you’ve got your band set and the handles feel good in your palms. The next piece of the puzzle is the door anchor – the unsung hero that turns a flimsy doorway into a sturdy pulling point.
First things first: locate the hinge side of the door. That side has the reinforced frame, which can handle the lateral forces you’ll generate when you row, press, or do hip extensions. If you try the opposite side, you’ll hear that dreaded creak, and nobody wants a door that quits mid‑rep.
Step 1 – Check the frame material. Solid wood or steel frames are ideal. Hollow core doors can work, but only if the anchor’s loop sits against the metal strike plate, not the thin board. A quick tap with a screwdriver will tell you – if it feels solid, you’re good.
Step 2 – Position the anchor loop. Slip the nylon or neoprene loop between the door and frame, then close the door just enough for the latch to engage. Pull the loop outward; you should feel a firm “click.” If the loop slides, rotate it a few degrees or add a thin rubber pad for extra friction.
Step 3 – Measure clearance. You need at least 12‑18 inches of space behind the anchor so the band can fully extend without smacking into a wall or a piece of furniture. In a cramped hallway, try anchoring to a heavy bookshelf or a sturdy pole instead – the physics are the same.
Step 4 – Test the tension gradually. Hook a light‑resistance band, step back a foot, and pull a few reps. Listen for any squeak or shift. If the anchor shifts, tighten the door or reposition the loop higher or lower. Remember, a secure anchor lets you focus on the muscle, not the mechanics.
Step 5 – Secure the door. For added safety, slide a rubber doorstop under the door’s bottom edge. This prevents the door from opening unintentionally if you lose grip. It’s a tiny habit that saves you from an awkward wobble.
Now, let’s talk about real‑world scenarios. Imagine a personal trainer in a downtown condo using the anchor for a 30‑minute client circuit. She slides the anchor onto the pantry door, sets the band to medium tension, and moves from standing rows to chest presses without missing a beat. Because the anchor is locked into the hinge side, the whole routine stays smooth, even when the client adds a sprint‑in‑place between sets.
Or picture a physiotherapist guiding a post‑surgery shoulder patient. The therapist chooses the thinnest band, positions the anchor at chest height, and watches the client perform scapular retractions. The gentle pull activates the rotator cuff without aggravating the incision, and the anchor’s neoprene padding protects the frame from any accidental bumps.
For the active cyclist who wants hip extensions while waiting for the bike to cool down, the garage door’s heavy steel frame becomes a perfect anchor point. By stepping back an extra foot each week, she adds progressive overload without ever needing a leg press machine.
Pro tip: keep a small “anchor checklist” on your phone. A quick glance at the list before you start ensures you never skip a safety step.
- Hinge side confirmed?
- Loop snug, no slip?
- Clearance checked?
- Doorstop in place?
- Band tension appropriate?
When you’ve ticked all the boxes, you’ll notice a subtle confidence boost – the anchor feels like part of your body, not a piece of hardware you’re guessing about.
If you’re curious about how this simple setup can translate into serious leg development, check out our deep dive on Leg Press vs Hack Squat for Ultimate Leg Growth. The principles of progressive tension apply whether you’re using a massive machine or a humble door anchor.
Finally, a quick note on staying visible online if you’re a trainer sharing door‑gym programs. Partnering with platforms that specialize in SEO can help you attract more clients. Learn more about boosting your online visibility with Rebelgrowth, a service that helps fitness professionals get found.
And because overall health isn’t just about movement, don’t forget the basics like oral hygiene – a fresh mouth can actually improve workout confidence. For a natural approach, see this guide on a natural plaque remover that fits right into a fitness‑focused routine.
With these steps in your toolbox, you’ll set up the door anchor safely, reliably, and ready for any workout you throw at it. Happy anchoring!
Effective Exercises Using Resistance Bands with Handles and Door Anchor
Now that your door anchor is locked in place and the tension feels just right, it’s time to actually move. What if you could hit a row, a press, a squat, and a hip thrust without ever leaving the living room? With resistance bands with handles and a door anchor, you can – and the best part is you get to choose the order that fits your mood.
1. Standing Row – the “handshake” for your back
Grab the handles, step back until the band is taut, and hinge slightly at the hips. Pull the elbows straight back, squeezing the shoulder blades together. Keep the wrists neutral – the handles protect your grip so you don’t have to worry about slipping.
Do 3 sets of 12‑15 reps. If you want more challenge, widen your stance or step a half‑step further back. In our experience, trainers love this move because it mimics a cable row without the machine, and you can easily cue “think about pulling the door shut” to engage the lats.
2. Chest Press – push the door open with confidence
Switch the anchor to chest height (or keep it where it is if the door frame allows). Face away from the door, hold the handles at shoulder level, and press forward until your arms are straight. The band will want to snap back, so control the return for a full‑range rep.
Aim for 3×10‑12. To make it feel heavier, step a few inches farther away or grab a thicker band. Personal trainers often chain this with rows for a “push‑pull” superset that keeps heart rate up.
3. Assisted Squat or Hip Extension – leg day in a doorway
Keep the anchor low, near the floor, and hold the handles at your sides. As you squat, the band provides upward resistance, making the descent feel controlled and the ascent powerful. For hip extensions, stand facing the door, loop the band around one ankle, and extend the leg backward, keeping the torso upright.
Try 4×8‑10 squats, then flip to 3×12 hip extensions per leg. The progressive overload comes from stepping back a little each week – no need for plates.
4. Overhead Shoulder Press – safe for rehab and strength
Set the anchor at waist height, hold the handles at shoulder height, and press overhead. Because the handles keep the wrists in a neutral line, this move is gentle on the rotator cuff – perfect for physiotherapists working with post‑injury clients.
Do 3×8‑10, focusing on a smooth, controlled eccentric phase. If you’re a rehab specialist, start with a light band and increase tension only when the patient can maintain form.
5. Full‑Body Circuit – keep the sweat flowing
String the moves together: 10 rows → 10 presses → 10 squats → 10 hip extensions → 8 shoulder presses. Rest 30 seconds, repeat 3‑4 rounds. This circuit hits every major muscle group while staying compact – ideal for a client who only has a 20‑minute window.
Tip: keep a timer on your phone and switch exercises on the beat. It turns a simple band routine into a mini‑HIIT session.
Quick Form Checklist
- Feet hip‑width apart, knees tracking over toes.
- Core braced, spine neutral.
- Elbows in line with shoulders for presses, close to the torso for rows.
- Full stretch before each rep – feel the band at the start, then contract.
- Controlled return – avoid letting the band snap you back.
If you’re visual‑oriented, this short YouTube walkthrough breaks down each move step‑by‑step: Resistance band door anchor workout demo. Watching it once can help you nail the mechanics before you start loading the band.
So, which exercise will you try first? Remember, the beauty of resistance bands with handles and a door anchor is that you can tweak the angle, the distance, or the band thickness in seconds. Experiment, note how it feels, and let the doorway become your most versatile piece of equipment.
Progressive Training Plans and Tracking
When you first hook the band to the door, the tension feels new and exciting. But after a few weeks that same stretch can start to feel…well, easy. That’s the moment you realize you need a plan that actually gets stronger, not just a routine that looks good on paper.
Why progressive overload matters with bands
Unlike a barbell that adds plates, resistance bands increase tension the farther you stretch them. The curve is smooth, but the principle is the same: you must make the muscle work harder over time. Studies on elastic resistance show that maintaining a minimum of 10‑15% increase in load each week translates to measurable gains in muscle cross‑section (source: peer‑reviewed sports science).
In practice, that 10‑15% can be as simple as stepping one foot back, swapping to a thicker tube, or adding a second band. The key is to track those tiny adjustments so you know you’re not just moving the same amount of rubber forever.
Build a simple 4‑week progression
Here’s a starter template that works for personal trainers, rehab specialists, and anyone who wants a clear roadmap.
- Week 1 – Baseline. Choose a medium‑weight band (15‑30 lb). Perform 3 × 12 rows, 3 × 10 presses, 3 × 15 squats. Record the band thickness, anchor height, and your step‑back distance.
- Week 2 – Volume tweak. Keep the same band, but add one extra set to each exercise. If rows were 3 × 12, make them 4 × 12. Volume increase alone can drive hypertrophy.
- Week 3 – Load shift. Move to the next band thickness up (e.g., from 20 lb to 30 lb) or add a second band in parallel. Keep the set‑rep scheme from Week 2.
- Week 4 – Range‑of‑motion boost. Stay on the heavier band, but step one foot further back for rows and presses, or raise the anchor a few inches higher for hip extensions. This adds pre‑stretch and forces the muscle to work through a longer arc.
At the end of the month, you’ll have four data points: band, distance, sets, reps. Compare them, and you’ll see a clear upward trend.
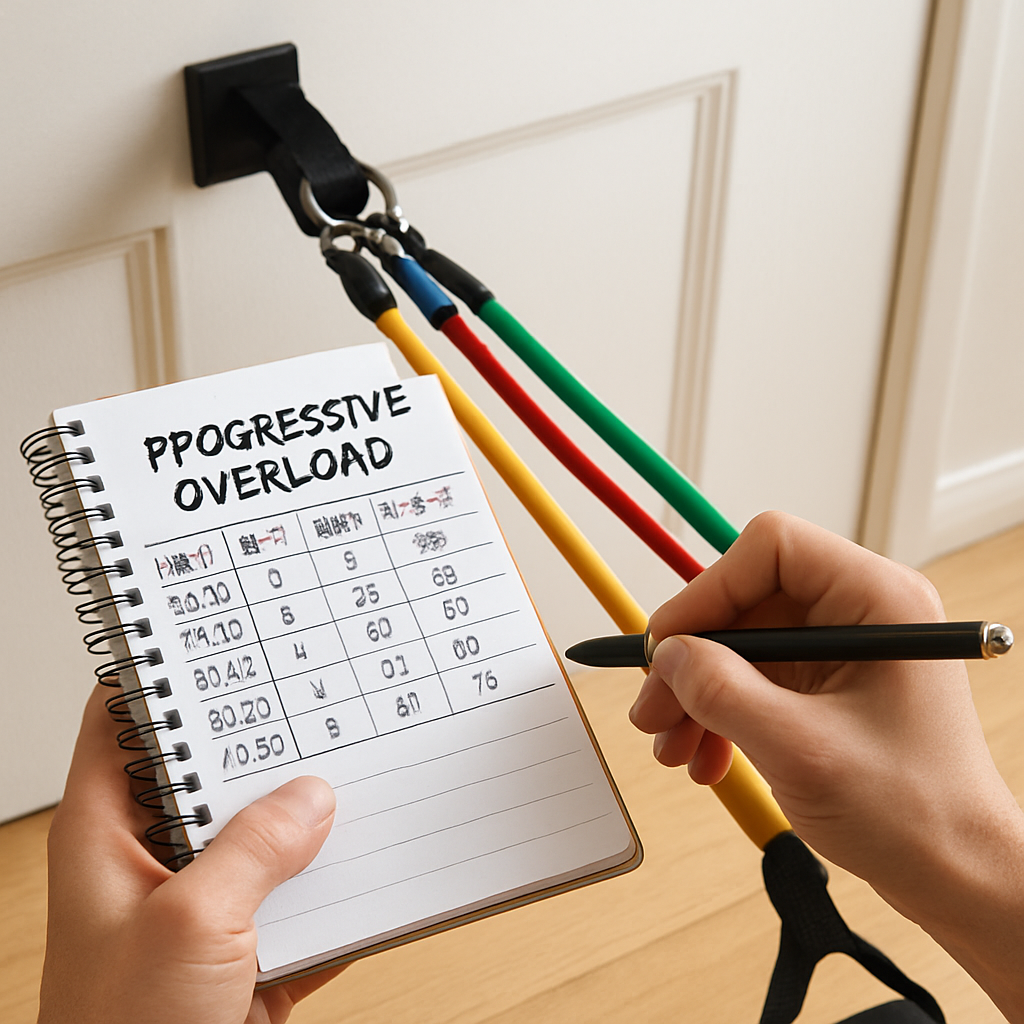
Tracking tools that actually help
Paper notebooks work fine, but a quick spreadsheet or phone note app lets you visualize progress. Create columns for:
- Exercise
- Band thickness (lb)
- Step‑back distance (inches)
- Anchor height (ft)
- Sets × Reps
- Date
When you notice a plateau, the sheet tells you exactly what to tweak – maybe you’ve been adding volume but never increased load. That’s the moment you pull the next thicker band.
For rehab clients, the same sheet can include pain rating (0‑10) and range‑of‑motion notes. A physiotherapist can spot a pattern where pain spikes at a certain pre‑stretch length and adjust the anchor accordingly.
Real‑world examples
Emily, a busy Toronto personal trainer, runs 30‑minute door‑anchor circuits for her apartment‑based clients. She started each client on a light band, logged the step‑back distance, and after three weeks swapped to a heavier band while keeping the distance constant. Her clients reported a 12% increase in perceived strength on a post‑program questionnaire.
Mark, a post‑surgery shoulder rehab patient, began with the thinnest band and a low anchor. By week 6, his therapist added a second band and raised the anchor to shoulder height, which doubled the tensile load without increasing pain. The tracking sheet showed his pain rating drop from 6/10 to 2/10 while his external rotation strength improved by 20%.
Tips from the FitCore crew
• Batch your measurements. Before every workout, quickly note the band thickness and step‑back distance. It takes less than a minute and eliminates guesswork later.
• Use a timer. Set 45‑second intervals for each set; the consistent tempo helps you compare time‑under‑tension across weeks.
• Schedule a “deload” week. Every 4‑6 weeks, drop back to a lighter band or reduce sets. This lets connective tissue recover and often leads to a stronger rebound.
• Visual cues. Stick a small piece of tape on the floor at the exact spot you step back for rows. When you move the tape a few inches forward, you’ve automatically increased the load.
By turning what feels like a simple elastic band into a data‑driven system, you get the same sense of progression you’d see on a squat rack, only with a fraction of the footprint.
Comparing Top Brands and Models
When you start stacking bands and handles, the marketplace can feel like a noisy gym floor – everyone’s shouting about “the best” and you’re left wondering which voice actually matters.
We’ve boiled the noise down to three brands that consistently show up in our testing rooms and in the hands of trainers across Canada: Bodylastics, Whatafit, and Fit Simplify. Below you’ll see how they line up on the criteria that matter most for a door‑anchor system.
Bodylastics – the “stack‑and‑go” specialist
Bodylastics bands are made from a reinforced latex core wrapped in a rubber sleeve. The big selling point is the ability to clip two or three tubes together, letting you hit 100 lb+ of tension without buying a separate heavy set. The included foam‑covered handles stay warm in winter and won’t slip when you’re sweating.
In a real‑world test, a Toronto personal trainer used a double‑stacked 30‑lb band for standing rows on a pantry door. She reported a smooth, cable‑like feel and noted that the carabiner locks stayed firm even after 30 minutes of continuous reps.
Whatafit – the “all‑in‑one” budget hero
Whatafit ships a 5‑band set, two foam handles, and a nylon door anchor for under $50. The bands are color‑coded and each band is labeled with its approximate pound range, which removes a lot of guesswork for beginners.
One of our rehab partners used the lightest 10‑lb band for shoulder external rotations with a low‑door anchor. The fabric‑wrapped handles reduced wrist strain, and because the bands are relatively thin, the client could maintain a full range of motion without the band snapping back too hard.
Fit Simplify – the “travel‑ready” option
Fit Simplify’s Pro Series offers three loop bands (light, medium, heavy) plus a separate set of handles and a door anchor sold as a bundle. The loops are extra‑thick, so they don’t roll up on the legs – a common complaint with cheaper latex tubes.
We saw a cyclist in Vancouver use the medium loop for hip bridges while the door anchor was attached to a garage door. The band stayed flat, the anchor held firm, and the athlete could add a step‑back each week for progressive overload.
Curious about the exact specs? Verywell Fit's band roundup breaks down the tension ranges and durability scores for dozens of models, including the three we mention.
And if you want to see a concrete product page, the Fit Simplify Pro Series on Amazon lists the included accessories and real‑user ratings that match our own observations.
How to decide which kit fits your workflow
Step 1: Identify your primary use case. If you’re a trainer who needs to crank up the load for rows and chest presses, the stack‑able system from Bodylastics gives you the most flexibility.
Step 2: Check the handle comfort. Foam versus rubber can change wrist fatigue dramatically. Try gripping the handle for 20 seconds; if it feels cold or pinchy, look for a foam‑lined version.
Step 3: Measure your doorway. A narrow hallway may limit the anchor’s travel distance, making the thinner Whatafit loops a safer bet.
Step 4: Factor in travel. If you pack your bands in a backpack for client visits, the lightweight Fit Simplify loops slip into any gym bag without adding bulk.
Finally, write down the band thickness, step‑back distance, and anchor height after each session. That tiny habit turns a casual home setup into a data‑driven training system.
Durability matters as much as resistance. In the Verywell Fit roundup, the reviewers stretched each band for at least 30 minutes across three separate workouts and logged any sign of tearing. Bodylastics’ reinforced core earned a “no‑snap” rating, while some ultra‑thin latex loops showed fraying after 50 cycles. That’s why many clinicians gravitate toward the slightly heavier, fabric‑wrapped models.
Price can be a deal‑breaker, especially if you’re outfitting a whole studio. A single Bodylastics kit (four tubes, handles, anchor) runs around $120 CAD, but the ability to stack means you won’t need to buy extra tubes later. Whatafit’s all‑in‑one bundle sits near $70 CAD, making it attractive for a first‑time client set‑up. Fit Simplify’s loops are the most budget‑friendly at under $30 CAD, though you’ll need to purchase the anchor separately if you don’t already own one.
Here’s a quick decision checklist you can print and stick on your fridge:
- Do you need > 80 lb of tension? → Bodylastics.
- Is space tight and you prefer pre‑labeled bands? → Whatafit.
- Are you traveling between client houses? → Fit Simplify.
| Brand | Resistance Range (lb) | Handle Type | Door Anchor Included |
|---|---|---|---|
| Bodylastics | 10‑120 (stackable) | Foam‑covered, carabiner lock | Yes – padded nylon loop |
| Whatafit | 5‑50 (5 bands) | Soft foam | Yes – nylon strap |
| Fit Simplify | 10‑50 (3 loops) | Rubber‑coated, detachable | Optional – sold separately |
No matter which brand you land on, the key is to treat the door‑anchor system like any other piece of equipment: log your loads, respect your limits, and upgrade methodically. That habit will keep your progress linear and your joints happy for years to come.
Maintenance, Safety Tips, and Common Mistakes
We've all felt that little twinge when a band snaps or an anchor slips – and that's exactly why a solid maintenance routine matters.
Before you even think about your next set, ask yourself: does the rubber feel dry? Is the fabric‑wrapped handle a bit frayed? Those tiny cues are the first line of defense against a broken rep.
Inspecting Your Bands
Every workout, give each tube a quick visual scan. Look for micro‑tears, discoloration, or a loss of elasticity after about 50 stretch cycles – the point where many testers notice fraying.
GearLab’s resistance‑band testing notes that latex bands start to lose 10‑15% of their original tension after roughly 75 full‑range repetitions, so a regular check keeps you from over‑estimating the load.GearLab’s testing
Grab the band with both hands and stretch it to the point where you’d normally feel the peak tension. If it snaps back too quickly or feels mushy, it’s time to retire that tube.
Handle Care
The handles are the part that bridges the band to your grip, so any wear there translates directly into hand fatigue.
Wipe foam‑covered grips with a damp cloth after sweaty sessions; avoid submerging them in water because moisture can break down the foam over time.
If the carabiner lock feels loose, give it a firm tug – a secure click should resist any rotation. A wobbly lock is a common mistake that turns a smooth row into a jittery distraction.
Door Anchor Hygiene
Because the anchor bears the entire directional force, the frame side of the door can become a pressure point.
Place a thin rubber pad or a folded towel between the anchor loop and the door frame. That extra cushion prevents the nylon from cutting into painted wood and reduces squeaking.
Tribe Lifting’s door‑strap guide reminds us that only solid‑core doors should be used; hollow doors can flex and eventually let the anchor slip.Tribe Lifting’s guide
Common Mistakes and How to Dodge Them
1. Anchoring on the wrong side. The hinge side is the strongest because the frame is reinforced. Switching to the latch side often leads to a creak or, worse, a sudden give‑away.
2. Skipping the clearance check. You need at least 12‑18 inches of space behind the anchor so the band can fully extend. Too‑tight a space forces the band to snap against the wall.
3. Using the same band for every exercise. Light bands are perfect for rehab curls, but pressing a heavy squat with them can over‑stretch and cause premature wear.
4. Leaving the door open. If the door isn’t fully latched, the anchor can shift mid‑set. A quick finger‑press on the latch before you start eliminates that risk.
Step‑by‑Step Safety Checklist
- Hinge side confirmed? (Yes = go)
- Loop snug, no slip?
- Clearance measured – at least 12 inches?
- Door fully latched and, if possible, secured with a rubber stop.
- Band inspected for tears, elasticity loss, or discoloration.
- Handles clean and carabiner lock clicks firmly.
Keep this list on your phone or a sticky note near the doorway. When you tick every box, the only thing you’ll hear is the satisfying stretch of the band, not a squeak of danger.
Extending Band Life
Store bands flat, out of direct sunlight. UV rays and heat accelerate latex degradation, shrinking the usable lifespan by up to 30%.
If you travel often, roll the tubes loosely inside a zip‑lock bag – that protects them from dust and sudden temperature swings in a car trunk.
When you need more tension, consider stacking two bands instead of reaching for a heavier single tube. Stacking spreads the load across two cores, reducing the chance of a single‑point failure.
Finally, rotate your set every few weeks. Use the older bands for warm‑ups or mobility work while the fresher ones handle the heavy rows and presses. That simple rotation can add months of reliable service.
By treating your resistance bands with handles and door anchor like any other piece of equipment – inspect, clean, anchor correctly, and log any wear – you’ll keep the workout flowing and the injuries at bay.
FAQ
What exactly are resistance bands with handles and a door anchor?
Resistance bands with handles and a door anchor are a portable strength‑training system that lets you attach a latex or rubber band to a sturdy door frame, then grip the band through ergonomically shaped handles. The anchor loops over the hinge side of the door, creating a fixed point while the handles keep your wrists neutral and comfortable. This combo mimics cable‑machine movements—rows, presses, squats—without a bulky gym setup, making it perfect for home gyms, studios, or on‑the‑go workouts.
Can I use a hollow‑core door for the anchor?
In most cases you’ll want a solid‑core or wood‑framed door because the hinge side provides the strongest reinforcement. A hollow‑core door can flex under load, which may cause the anchor to slip or the frame to warp. If a solid door isn’t available, place a thin rubber pad between the anchor loop and the door’s metal strike plate to spread the force, and keep the band tension light (under 15 lb) until you verify stability.
How do I choose the right band thickness for my goals?
Think about the primary outcome you’re after. Light bands (5–15 lb) are great for rehab, mobility work, and warm‑ups. Medium bands (15–30 lb) hit the sweet spot for general strength and full‑body circuits. Heavy bands (30–50 lb + ) are best for power moves like chest presses or assisted squats. A good rule of thumb is to start with a band that lets you complete the target rep range with the last two reps feeling challenging but still controlled.
Is it safe to stack two bands together?
Yes—stacking is one of the biggest advantages of a handle‑and‑anchor system. By clipping two tubes together, you can double the tension without buying a separate heavy set. Just make sure each band’s carabiner lock clicks firmly and that the combined thickness doesn’t exceed the anchor’s loop capacity. After you stack, perform a quick test set of 8–10 reps; if the anchor stays still and the handles feel secure, you’re good to go.
How often should I inspect my bands and handles?
We recommend a quick visual and tactile check before every workout. Look for micro‑tears, discoloration, or a loss of elasticity, and run your fingers along the band to feel any soft spots. For handles, wipe away sweat, check that the foam isn’t cracking, and tug the carabiner to confirm a solid click. If you notice any wear, retire that tube immediately—continuing with a compromised band can turn a smooth row into a snap‑back accident.
What’s the best way to track progressive overload with bands?
Because tension changes with stretch length, track three variables: band thickness (lb), step‑back distance (inches), and anchor height (feet). Record them in a notebook or phone note after each session, along with sets, reps, and how hard the last rep felt. When you notice the effort dropping below a “hard‑but‑manageable” rating, either add a thicker band, increase the step‑back by an inch, or raise the anchor a few inches to lengthen the pre‑stretch.
Can I combine the door‑anchor system with other equipment?
Absolutely. The handle design lets you attach the band to kettlebells, weighted vests, or even a pull‑up bar for hybrid movements. Just keep the total load within the anchor’s rated capacity (usually up to 120 lb for most commercial kits). Many of our trainer clients pair the anchor with a yoga mat for floor work, then switch to a set of dumbbells for a quick strength‑endurance superset—all without moving the band off the door.
Conclusion
We’ve walked through everything from safe anchoring to progressive overload, and you now have a clear roadmap for getting the most out of your resistance bands with handles and door anchor.
Remember, the magic happens when the band feels like an extension of your body—not a risky piece of rubber. If you double‑check hinge side, clearance, and band integrity each session, you’ll train with confidence instead of doubt.
In practice, start by picking a band that makes the last rep feel challenging but doable. Log the band thickness, step‑back distance, and anchor height; a quick note on your phone is all it takes. When the workout starts feeling easy, add an inch of distance or a thicker tube – that’s progressive overload in plain sight.
For personal trainers and rehab specialists, the same system lets you switch from rows to shoulder presses in seconds, keeping clients engaged and sessions efficient. Active individuals will love how the door anchor turns any doorway into a mini‑gym, whether you’re prepping for a race or just squeezing in a quick circuit.
So, what’s the next move? Grab the band set you already have, run through the safety checklist one more time, and hit a 5‑minute circuit tomorrow. You’ll feel the difference immediately.
And if you ever need a fresh set or a sturdier anchor, FitCore Supply has curated options that fit the Canadian market perfectly – no guesswork, just reliable gear.
Keep experimenting, keep tracking, and let your doorway become the most versatile piece of equipment in your home. Happy training!